


This post will explain how to disable Narrator on a Windows 11/10 computer. The Narrator is a screen reader tool in Windows OS that reads aloud the text on your computer screen, explains calendar appointments, reads a document, starts menu items, and so on. On Windows 11/10 machines, enabling and using Narrator, as well as configuring Narrator settings, is a breeze. However, if you don’t use this screen reader capability and wish to disable it temporarily or permanently, this post will assist you with a Registry trick.
Once you’ve disabled the Narrator, you won’t be able to switch it on or off using its shortcut (Win+Ctrl+Enter), the Narrator button in the Quick Settings panel of Windows 11, or the Narrator button in the Settings app of Windows 11/10. In addition, it will not operate if you toggle the Narrator button in the Windows 11 Quick Settings panel or the Windows 11/10 Settings app. But, don’t worry; you can permanently activate Narrator on Windows 11/10.
Guide to Disable Narrator on Windows 11/10 Computer
The procedures to disable Narrator on your Windows 11/10 computer are simple. However, because you will be editing the Windows Registry, you should make a backup in case you need to restore it.
After that, you may proceed as follows:
1. Access the Windows Registry
2. Select the Image File Execution Options option.
3. Make a registry entry for narrator.exe.
4. Develop a Debugger String Value
5. Enter 1 in the Debugger value’s Value data.
6. Click the OK button.
Open the Search box on your Windows 11/10 computer, type Regedit, and click the Enter key. It will launch the Windows Registry.
Now, choose the Image File Execution Options option. The following is the route to this key:
HKEY_LOCAL_MACHINE\SOFTWARE\Microsoft\Windows NT\CurrentVersion\Image File Execution Options
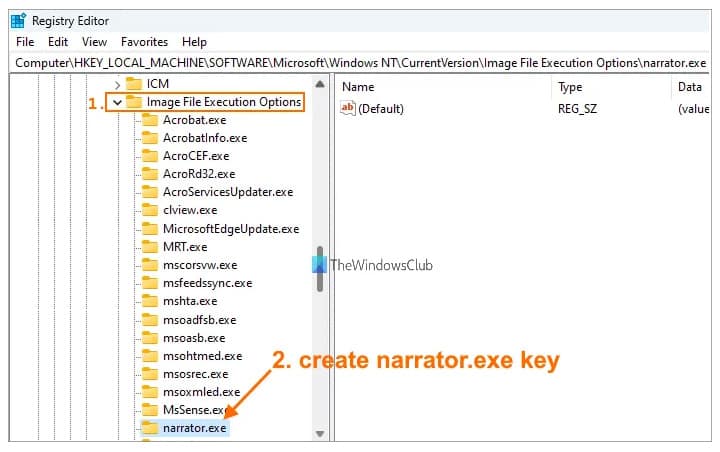

Please create a new Registry key under this key and rename it narrator.exe.
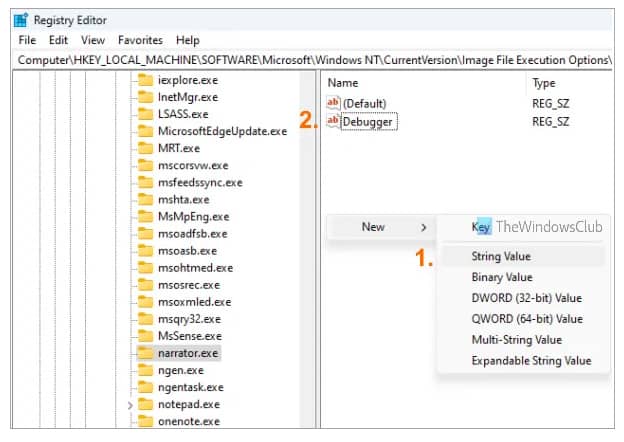
Create a Debugger name string value under this narrator.exe key. To do this, right-click on the right-hand area, choose New, and then String Value. When you’ve finished creating the string value, call it Debugger.

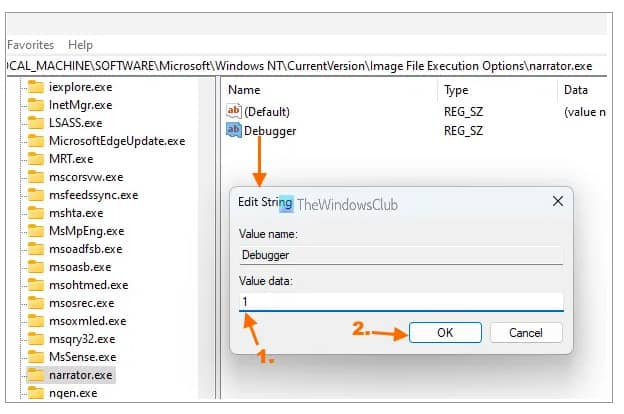
Continue by setting the value data of the Debugger value. When you double-click the Debugger string value, an Edit String box will appear. Add 1 to the Value data box and click the OK button.

The adjustments for deactivating the Narrator app are applied instantly. If, in some cases, the Narrator is not disabled, sign out, sign in, or restart your computer.
To re-enable Narrator on Windows 11/10, repeat the preceding procedures and remove the narrator.exe Registry key. Finally, reboot your computer (if changes are not applied).
How do I disable Narrator in Windows 11?
The narrator may be enabled or disabled in Windows 11 through the Settings app. The steps are as follows:
1. Use the Win+I hotkey. To launch the Settings app.
2. From the left panel, choose the Accessibility category.
On the right-hand side, go to the Narrator app.
You will now see an option to enable or disable Narrator.
The Win+Ctrl+Enter key may also be used to toggle Narrator on and off. Aside from that, you may enter the Windows 11 Quick Settings panel (by clicking on the volume, battery, or Wi-Fi icon in the system tray) and go to Accessibility to turn off Narrator.
How can I permanently disable the Narrator?
A Registry hack allows you to disable Narrator on a Windows 11/10 computer permanently. The procedures to use that Registry technique are explained in full in the post above. Follow those instructions carefully to turn off or disable Narrator on your computer. When you wish to use Narrator, you will also be able to switch it on or off. Also read article on how to Download & Install Windows Security.