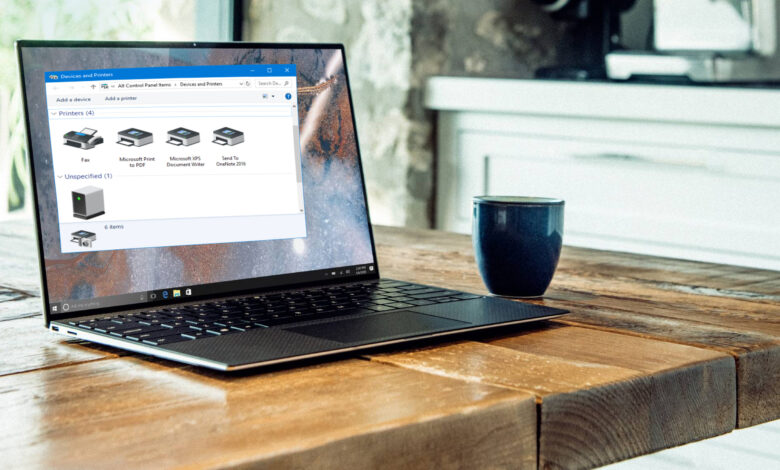
This guide will show you how to create a printer shortcut on Windows 11/10 PC. Earlier versions of Windows OS display a printer icon for the print queue in the taskbar’s system tray. However, you may not have such an icon with modern printing methods (such as cloud printing or Wi-Fi printing). So, creating a printer shortcut is an ideal choice if you use a printer often and want to access it fast from your Windows 11 computer’s desktop or taskbar.
How can I create a desktop printer shortcut?
Adding a printer shortcut to the Windows 11 desktop is simple. All you need is the printer’s name and the shortcut wizard. The printer’s name may be found in the Windows 11 Settings app, and the shortcut wizard is necessary to enter the required string and printer name to create the printer shortcut. Check out this page for step-by-step instructions on how to create a printer shortcut on a Windows 11 PC.
Easy Steps to Create a Printer Shortcut in Windows 11/10
Ensure your printer is installed and connected to your computer before creating a shortcut. If not, you must first install or add a local printer, connect a wireless printer, or connect another printer to your Windows 11 computer system to create and access its shortcut.
How do you create a Printer shortcut in Windows 11/10?
In order to create a printer shortcut on your Windows 11/10 PC, follow these steps:
1. Using the Win+I hotkey, launch the Windows 11/10 Settings app.
- Windows 11, navigate to the Bluetooth & devices category.
- Windows 10, go to the Devices category.
2. Navigate to the Printers & Scanners page or category.
3. There, you will see a list of all the installed printers and their names. Remember or copy the printer’s name since the actual name of the printer for which you wish to create the shortcut is required.
4. Navigate to your Windows computer’s desktop and right-click on an empty spot.
5. Navigate to the New menu.
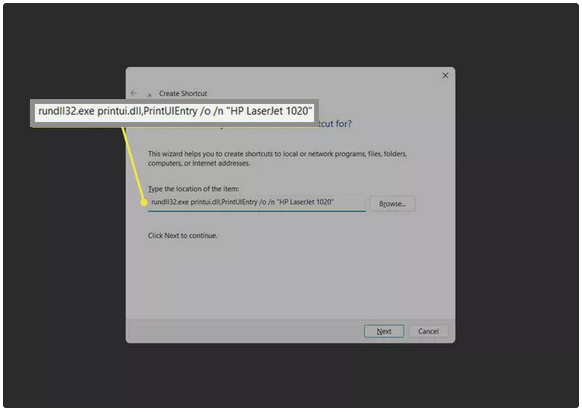
6. Select the Shortcut option. It will open the Create Shortcut window. There will be a text box for the Type the location of the item section in that window.
Enter the following string in the text field:
rundll32.exe printui.dll,PrintUIEntry /o /n “PrinterName”7. Replace PrinterName in that string with the printer’s real name. Then, hit the Next button.
8. Next, give your printer a name (any custom name) and click the Finish button. You may also pin the printer shortcut to the taskbar to make accessing that printer easier.
- Windows 10, right-click on the printer shortcut and choose the Pin to taskbar option.
- Windows 11, right-click on your printer shortcut and choose Show more options. It will bring up the standard context menu, from which you may select the Pin to taskbar option.
Create a Custom icon for the Printer shortcut
A default icon is set to every desktop shortcut, including the printer shortcut. It may not be to your liking. You may choose a different icon for the printer shortcut if you choose. Fortunately, Windows 11 has an option to modify file and folder icons (including desktop shortcuts). Here’s how to make a custom icon for your printer shortcut:
1. Right-click on the printer shortcut and choose Properties.
2. Navigate to the Shortcut tab in the properties box.
3. Select the Change Icon option. It will launch a little Change Icon box.
4. In that box, you will notice pre-added icons for your printer shortcut. If you want a custom icon, click the Browse option.
6. The Change Icon box will appear. Using that window, go to the folder containing the icon file you wish to use for your printer shortcut. Next, choose the icon file and press the Open button. You will be returned to the Change Icon box.
7. Click the OK button to return to the Properties box.
8. Click the OK button once again to dismiss the Properties window.
That’s all! The printer shortcut is successfully created and it will now show the icon that you requested.
How do I create a Devices and Printers shortcut in Windows 10?
The methods to create a desktop shortcut for Devices and Printers in Windows 10 are shown below. These methods are also applicable to the Windows 11 operating system. The steps are as follows:
1. Right-click on the desktop
2. Select the New menu
3. Use the Shortcut option in the New menu to activate the shortcut wizard
4. Copy and paste the following string into the available text field:
explorer.exe shell:::{A8A91A66-3A7D-4424-8D24-04E180695C7A}5. Give your shortcut a name.
6. Give the shortcut a name, such as Devices and Printers, or any other name.
On the desktop, you should now see the Devices and Printers shortcut.
It is all about how to create a Printer Shortcut in Windows 11/10, In simple words Click on Start > Control Panel > Hardware and Sound > Devices and Printers > Printers > select Create shortcut from the right-click menu. Also read article on how to Fix Windows Printer Error 0x0000011b.
