This article will discover how to download and install Windows Security on Windows 11. Windows Security sometimes causes unexpected errors, disables certain apps, or crashes due to a flaw. Restarting your computer may help fix the issue in some cases, but if it does not, you will need to use other troubleshooting approaches. Even though the app is enabled by default in Windows 11, you may need to reinstall Windows Security to fix the issue.
Because Windows Security is embedded into the operating system, there is no need to download and install it separately.
Windows Security is the package that comes standard with Windows. As a result, it is installed automatically when you install Windows 11. It proved to be one of Microsoft’s most successful security solutions.
It incorporates Microsoft Defender Antivirus, formerly known as Windows Defender Security Center, in previous Windows 10.
In most cases, the app provides excellent real-time protection for your PC against virus and malware threats.
However, the app is prone to problems, such as failing to open or working intermittently when launched.
You should first see whether the Windows Defender app is switched off and if activating it would help fix the issue.
However, if Windows Security is still not functioning, you may need to reinstall the app on your Windows 11 PC.
Before we get to the remedies, let’s have a look at how to get the Windows Security app if it won’t open on Windows 11.
How can I install Windows Security on Windows 11?
In most circumstances, you need to re-enable the Windows Security components from the Settings app to access it. To enable Windows Defender, follow these steps:
- To launch Windows Settings, use the Win + I shortcut key combination.
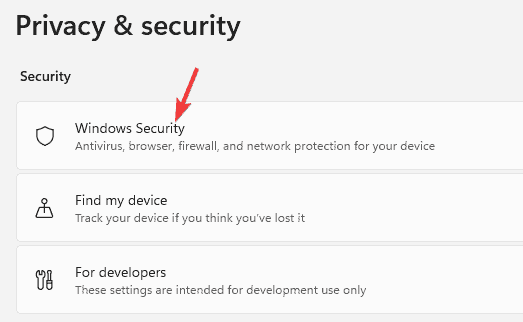
- On the left, choose Privacy & security.
- Then, on the right, choose Windows Security.
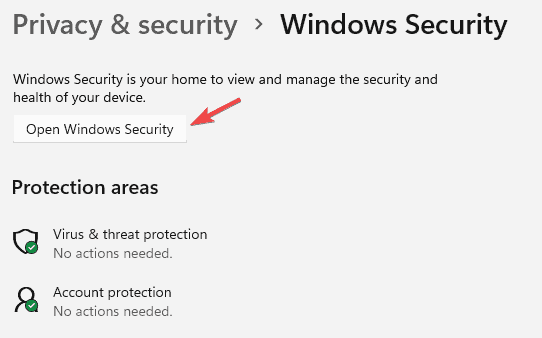
- Now, on the right, click on Open Windows Security.
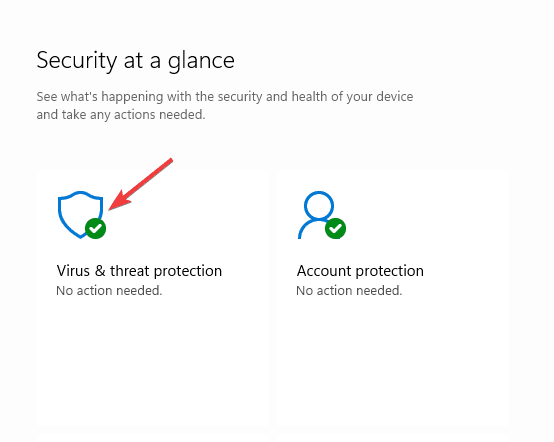
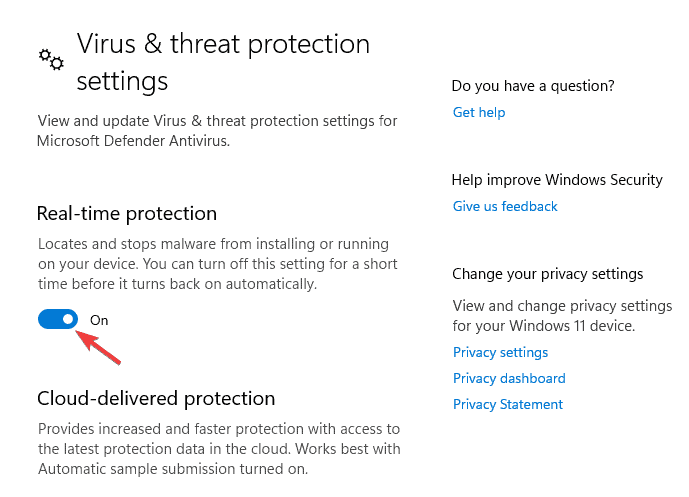
- When the app launches, go through the security settings on the right and enable Real-time protection.
- For instance, choose Virus & threat protection.
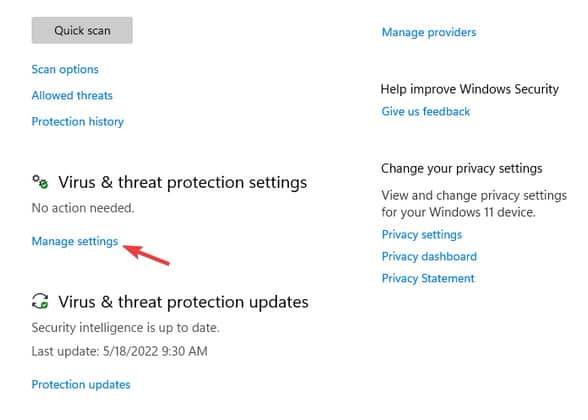
- Scroll down and select Manage settings on the following screen.
- Go to Real-time protection and enable it.
There are, however, other Windows Defender components, and you may visit each of them to enable their functionality.
However, if the Windows Security app is missing from your Windows 11 PC, you must reinstall it.
The solutions described in the following section may assist you with downloading and installing Windows Security on your Windows 11 device.
In Windows 11, how do I reinstall Windows Security?
1. Make use of Windows PowerShell
Download and install the Windows Security app.
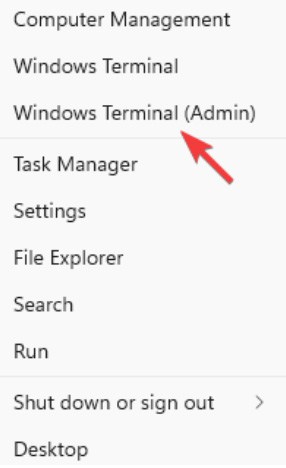
- Select Windows Terminal from the Start menu by right-clicking on it (Admin).
- This will launch Windows PowerShell in administrative mode.
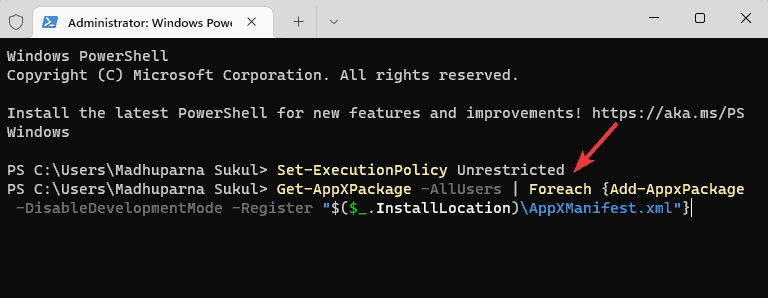
- Run the following commands in the Terminal one by one, pressing Enter after each one:
Set-ExecutionPolicy Unrestricted
Get-AppXPackage -AllUsers | Foreach {Add-AppxPackage -DisableDevelopmentMode -Register "$($_.InstallLocation)\AppXManifest.xml"}
When you see the success message, exit PowerShell and restart your computer.
It will turn off development mode for all apps. Try to relaunch the Windows Security app, and it should usually work.
Reinstall and Repair Windows Security
1. Right-click the Start button and choose Windows Terminal (Admin) from the appears menu.
2. Paste the following command into the Terminal and press Enter:
Get-AppxPackage Microsoft.SecHealthUI -AllUsers | Reset-AppxPackage
Exit the Terminal after the command has been successfully performed and generate the success message.
When the app is installed but not successfully installed, this will resolve any issues. As a consequence, the Windows Security software on Windows 11 will be reinstallable.
2. Restart the associated service
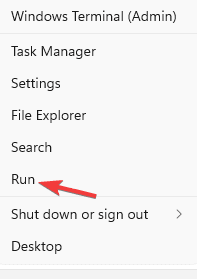
1. Please navigate the Start menu, right-click it, and then choose Run.
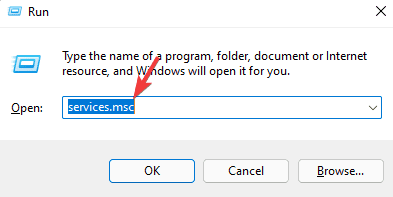
2. To launch the Service Manager, type services.msc into the Run console search box and hit OK.
3. Go to the right side and search for the Security Center service in the Names column.
4. Restart the service by right-clicking it.
The Security Center service is launched automatically when you boot your computer.
However, if it sometimes fails to run or is stopped, you will be unable to launch the Windows Security app on Windows 11.
Check whether you can now launch the Windows Security app after restarting the service.
3. Enable AntiSpyware from the Registry
- Right-click the Start button and choose Run to access the Run console.
- To launch Registry Editor, enter regedit into the search field and press Enter.
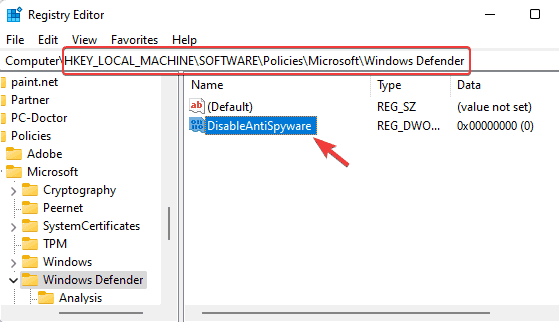
- Now, in the Registry Editor, browse to the following path:
Computer\HKEY_LOCAL_MACHINE\SOFTWARE\Policies\Microsoft\Windows Defender
4. Then, on the right, double-click on DisableAntiSpyware.
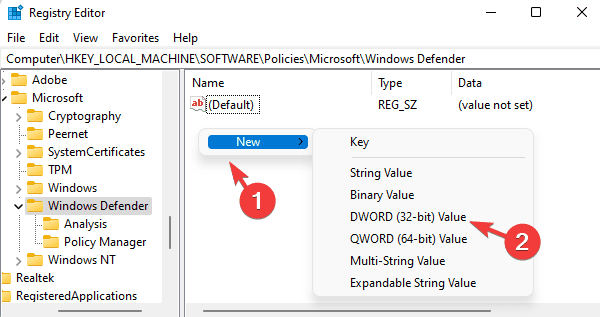
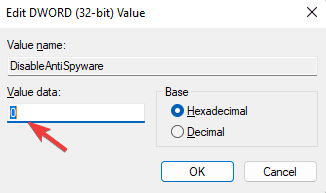
5. If the DisableAntiSpyware option isn’t accessible, right-click on a blank spot, choose New, and then DWORD (32-bit) Value.
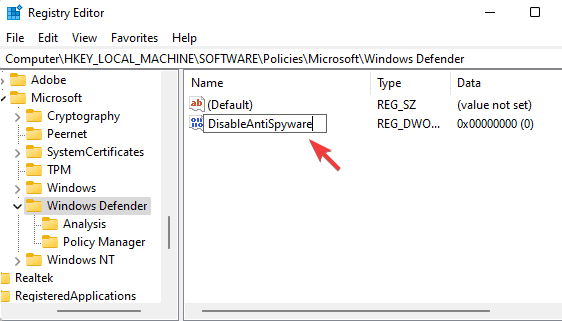
6. Change the name of the new DWORD Value to DisableAntiSpyware. To open it, double-click it.
7. The Edit DWORD (32-bit) Value dialogue box will now appear. Set the Value data to 0 here.
8. To save the changes, click OK.
Close Registry Editor and restart your computer. The Windows Security app should now be operational.
Changes to the registry settings may sometimes disable the Windows Security components. These might be unintentional alterations made by the user or a third-party program on your computer.
Follow our thorough tutorial on Windows 11’s Security center not opening for additional solutions on how to install Windows Security on Windows 11.
Furthermore, if you have third-party antivirus software installed and running on your machine, you may temporarily deactivate it to prevent it from interfering with the process.
You can now see whether the Windows security app is accessible on your Windows 11 PC.
Why doesn’t Windows Security operate in Windows 11?
Not opening the Windows Security app is a common issue, particularly with Windows 11 Insider releases. This issue frequently appears after a Windows OS update or at random.
You may also refer to our in-depth information on other Windows Security issues. While this is a Windows 10 instruction, it also works on Windows 11.
When the following conditions exist:
- System files are damaged
- Related services are not operating
- There is interference from a third-party antivirus
- Windows updates are pending
- System settings are changed due to an internal issue
- Registry settings are updated.
Most of the time, the Windows Security not functioning in the Windows 11 issue appears on the most recent build. If you have just updated to Windows 11, you may run across this issue.
For different solutions, use the procedures outlined above or consult our tutorial on Windows security not installed on Windows 11.
So, this is article on how to Download & Install Windows Security in Windows 11. If Windows Security still does not open on your Windows 11 PC, please leave a comment below, and we will try to come up with a remedy. Also read article on how To Fix Windows Didn’t Load Correctly.
