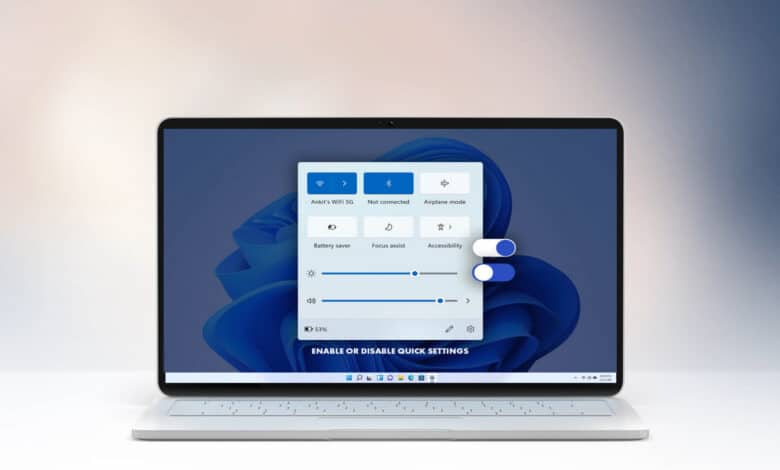
This post will show you how to enable and disable Quick Settings on your Windows 11 computer. When Quick Settings is enabled, users may use the Quick Settings panel to access Accessibility, switch Wi-Fi, enable/disable Battery saving, Airplane mode, Bluetooth, and other available functions. However, for those who do not need it, there are two options for concealing Windows 11 Quick Settings.
After you disable this option, the Quick Settings panel will not display. Its hotkey (Win+A) no longer works, and the system tray icons no longer open Quick Settings (battery, Wi-Fi, volume). But don’t worry; if you ever want to use Quick Settings again, you can enable and show it anytime.
How To Enable Or Disable Quick Settings In Windows 11 Computer
Method 1: Use the Group Policy Editor to disable Quick Settings.
1. Press Windows + S and enter Group Policy Editor into the search box.
2. From the search results, select Edit Group Policy.
3. A new window will open in which you must locate and expand the User Configuration folder, followed by Administrative Templates.
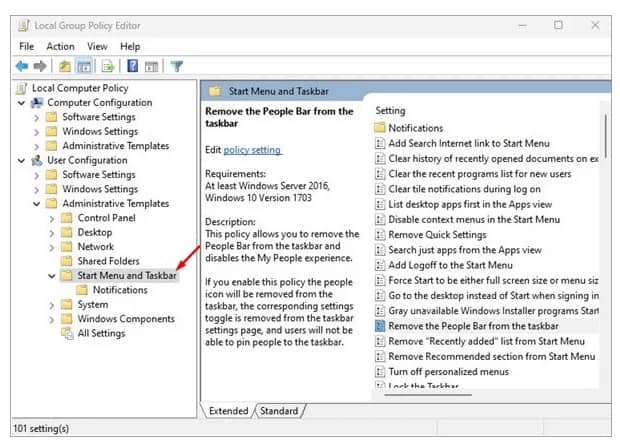
4. locate and select the Start Menu and Taskbar option.
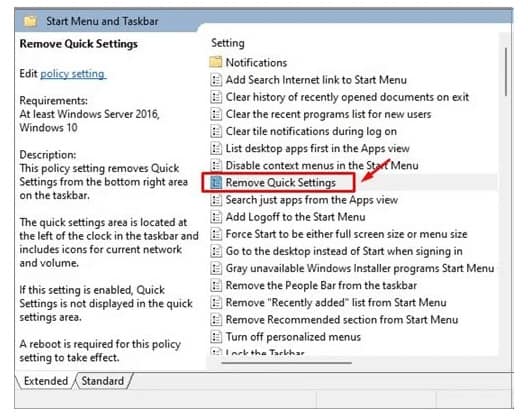
5. In the right panel of the group policy editor window, there will be a list of different settings. Double-click on the Remove Quick Settings option on the right section.
6. In the top left corner, select the Enabled option.
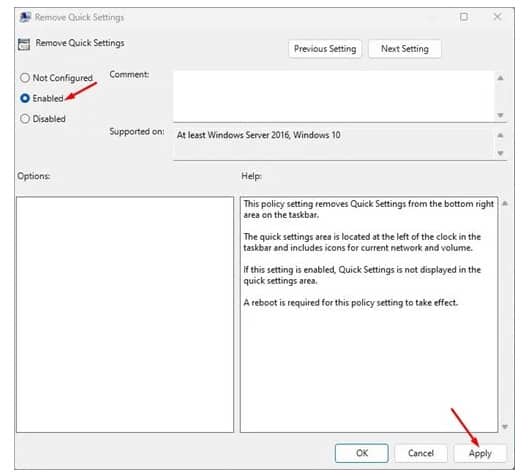
7. Select the OK button.
8. Reboot your computer to have the modifications take effect.
It will turn or delete Quick Settings from your Windows 11 system.
Note: To turn on or display Quick Settings in Windows 11, repeat the procedures outlined above, but this time selects the Not Configured option in the Remove Quick Settings dialogue. Click the OK button to reboot your computer.
Method 2: Disable Quick Settings Using the Windows Registry
1. Open the RUN box by pressing Windows + R.
2. In the text field, type Regedit and press the Enter key.
3. When the Windows Registry opens, go to the following location:
HKEY_LOCAL_MACHINE\SOFTWARE\Policies\Microsoft\Windows4. Select the Windows key and then locate the Explorer key. If it isn’t already there, you’ll have to make it.
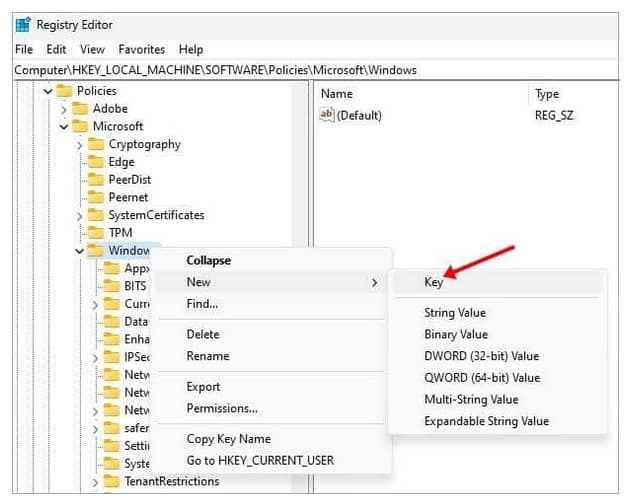
5. With the Windows key still selected in the left panel, right-click on the right panel and choose New, then DWORD (32-bit) Value.
6. Change the name of this key to DisableControlCenter.
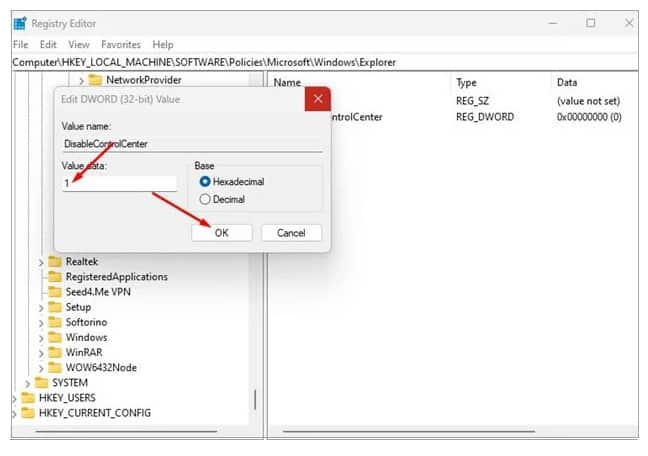
7. Double-click the DisableControlCenter key and set the value data to 1.
Exit the Registry Editor and reboot your computer.
Note: If you want to enable the quick Settings, repeat the procedures and modify the value data of the DisableControlCenter key from 1 to 0. Remember to reboot your computer after making any changes to the settings.
Last Words: How to Enable and Disable Quick Settings Windows 11
If you don’t like the default selections in Windows 11’s Quick Settings panel, you may easily change them by selecting the Edit quick settings button in the Quick Settings panel. A pencil symbol displays right before the Settings icon in the Quick Settings panel. Otherwise, you may permanently disable them using one of the abovementioned techniques. Also read article on how to Download & Install Windows Security?