Is your device showing the wrong time on Windows 11 after an upgrade? Don’t be concerned; we’ve got you covered. Here at digital magazine we discuss how to fix the wrong time on Windows 11 issue in details. If the clock timings on your PC are not synced, you may use various solutions to solve the issue. There might be a few reasons why the clock in Windows 11 is operating weirdly.
You may rapidly address this issue by modifying the date and time settings, re-registering the DLL files, changing the Internet server, using the Command Prompt to sync the time, and so on.
In this essay, we will show you how to sync the clock time on Windows 11 in no time. To fix the wrong clock time issue on Windows, try any of the options below.
How to Repair Windows 11 Clock Time Error
IN this guide we discuss seven different ways to fix the wrong time on Windows 11 issue. Let’s get this party started.
1. Configure Date and Time Settings Manually
Select “Settings” by tapping on the Windows icon in the Taskbar. Go to the “Time and Language” area from the left menu pane.
Turn the “Set time automatically” switch on. If this option was enabled by default, you may try turning it off and back on.
2. Make the Windows Time Service available
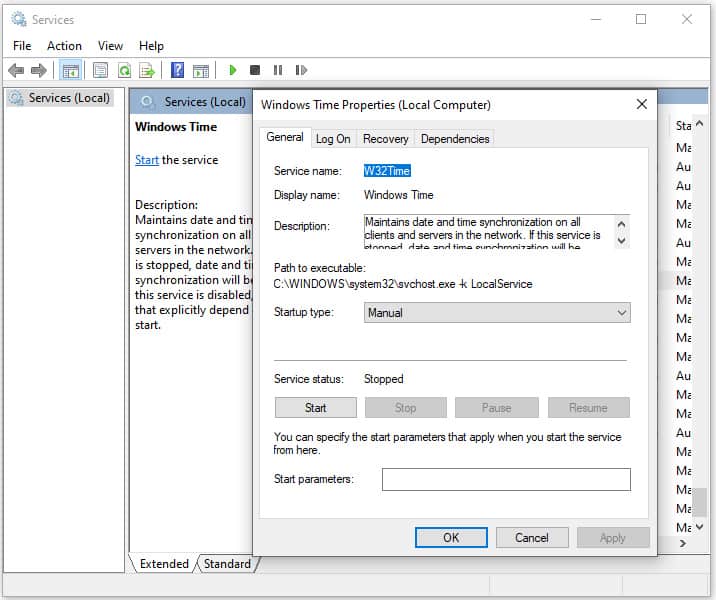
To launch the Run dialogue box, use the Windows + R key combination. Enter “Services.msc” into the search box.
Search for the “Windows Time” service in the list of services. Double-tap it to activate the Properties menu.
Select “Automatic” as the “Startup Type.”
To preserve recent changes, click the OK and Apply button.
3. Change the Internet Time Server settings
Here’s how to manually sync the Internet time server on Windows 11 to fix the “Windows 11 clock time wrong” issue.
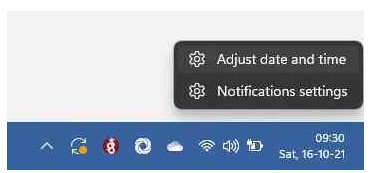
Select “Adjust Date and Time Settings” from the Taskbar context menu where the clock time is shown.
You’ll be sent to the date and time settings box. Scroll to the bottom and select “Additional clocks.”
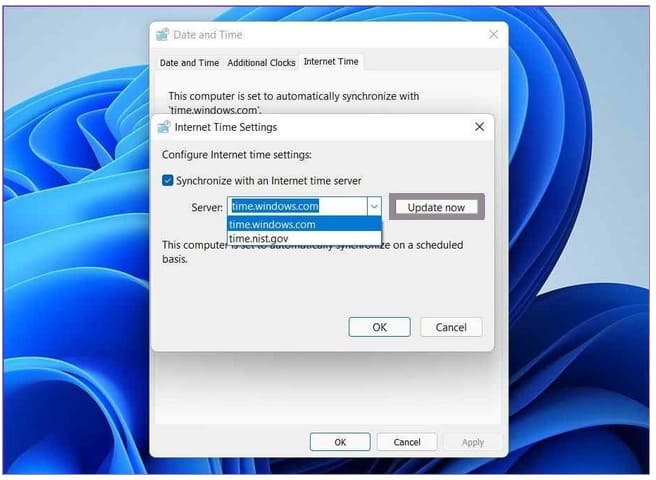
In the Properties box, go to the “Internet Time” tab.
Select a different server from the drop-down list by tapping on the “Server” option. To save the changes, click the OK and Apply buttons.
Reboot your device and ensure that the date and time are correctly displayed on the Taskbar.
4. Reinstall the Windows Time DLL
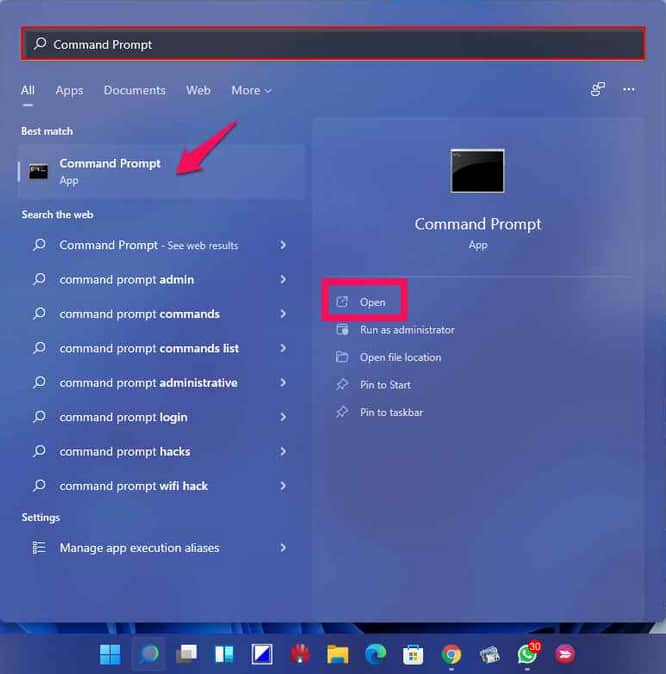
Tap the search icon in the Taskbar, type “Command Prompt,” and then select “Run as Administrator.”
To re-register the time DLL file on Windows 11, run the Command Prompt program in administrator mode and type the following command.
regsvr32 w32time.dll
After executing this command, reboot your device to see whether the issue remains.
5. Use CMD Commands to Sync Time
To manually configure the Windows Time service, follow these steps:
Tap the search icon in the Taskbar, type “Command Prompt,” and then select “Run as Administrator.”
Once the Command Prompt program is launched in admin mode, perform the following commands in order:
Net stop w32 time
w32tm /unregister
w32tm /register
Net start w32 time
w32tm /resync
After executing these instructions, reboot your system and verify that the clock is synced.
6. Examine the CMOS Battery
Have you tried the solutions suggested above and are still having trouble? If your laptop’s CMOS (Complementary Metal Oxide Semiconductor) battery fails or dies, the clock settings on your device may be messed up. The CMOS battery is a motherboard component that is used to power up your device’s BIOS settings. So, replace the CMOS battery on your system and see if it helps.
7. Run an SFC scan
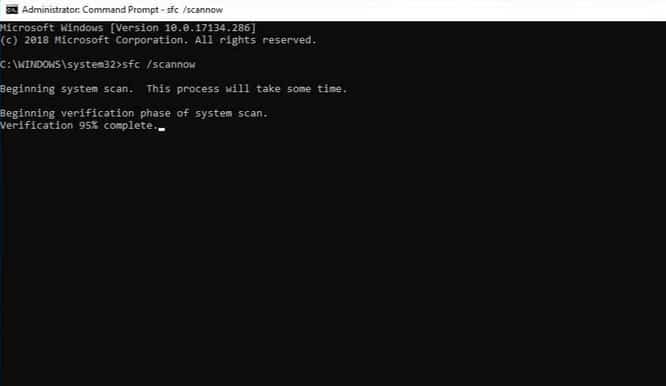
SFC (System File Checker) is a Windows application that checks for and repairs faulty system files. Run the SFC command in the Command Prompt Terminal to have Windows replace the corrupt system file with a cached copy. It may helps to Fix the wrong time issue on Windows 11.
Start Command Prompt in Administrator mode.
To execute the following command, type it and press Enter:
sfc/scannow
After executing this command, reboot your device to see whether the issue has been repaired.
Here are a few easy solutions to the “Fix The Wrong Time On Windows 11” problem. You may use these solutions to sync your device’s clock settings. Yes, you now understand how to change the date and time on Windows 11. Please let us know which technique worked best for you. Please leave your opinions in the comments section! Also read article on Windows 11 Error Sounds.


