
You will learn how to reinstall Microsoft Office Picture Manager by following the steps in this article. A complete guide with step-wise instructions to fix all issues. The newest versions of Microsoft Office have many new features; however, the Microsoft Office Picture Manager is no longer included in the MS Office Suite. Microsoft Office 2010 was the final version of MS Office to have Picture Manager.
Picture Manager enables users to view and edit pictures like the current Photos app. It had, however, not been updated since MS Office 2003. Microsoft introduced the Photos app as a contemporary alternative for the Microsoft Office Picture Manager; therefore, later versions of MS Office no longer feature the Picture Manager. However, if you’ve become used to making fast modifications with the Picture Manager, you may still install it as a separate app.
How to Install Microsoft Office Picture Manager
Here is how to Reinstall Microsoft Office Picture Manager in your PC. You don’t have to downgrade your MS Office to get it back since the app is accessible as a standalone. However, you may reinstall the Picture Manager by using the setup files for an earlier version of Microsoft Office (i.e., 2003, 2007, or 2010).
You may use the SharePoint Designer setup if you don’t have the setup files. The setup is free to download from the official Microsoft website. The method is roughly the same regardless of how you choose to install Picture Manager.
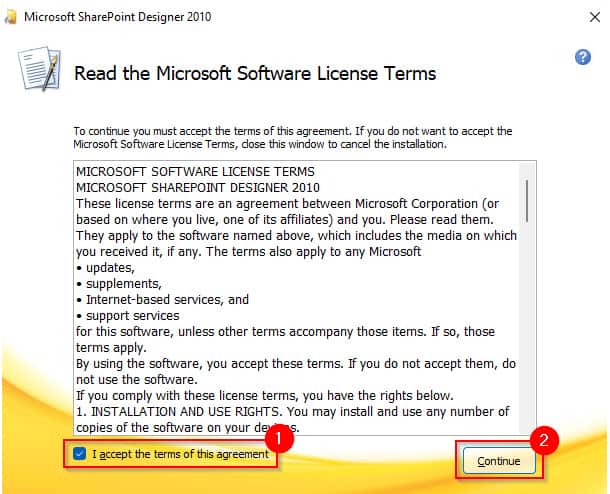
1. Install SharePoint Designer 2010 by double-clicking the.exe file.
2. The installation wizard will be launched. Select Continue after checking the box next to I accept the terms of this agreement.
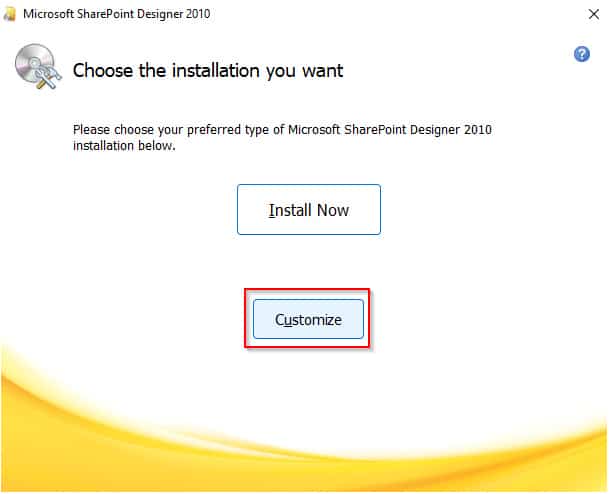
3. On the next page, select Customize.
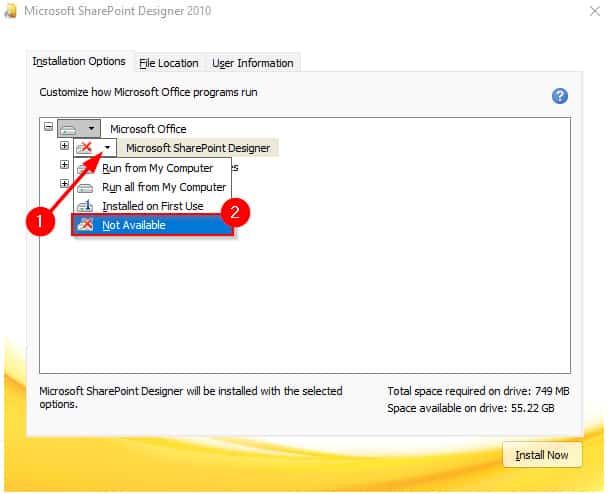
4. Select the Not available option for all modules in the list. You must do this so that the wizard does not install components other than the Picture Manager. The main difference between the Office setup and the SharePoint Designer 2010 setup is that you’ll have a few more modules. Label everything as unavailable.
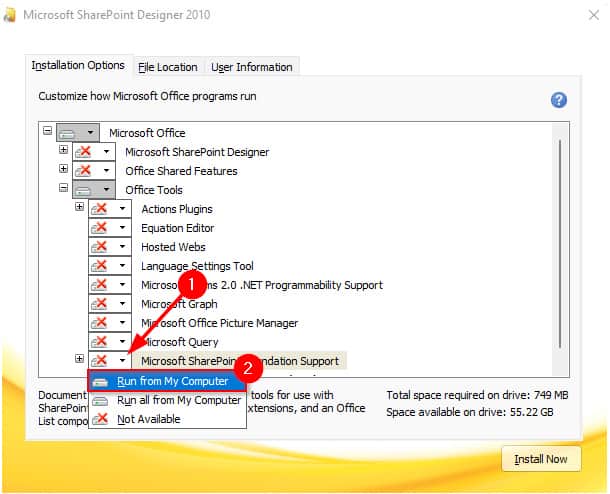
5. After you’ve eliminated all parts from the installation, go to the Office Tools module and select Microsoft Office Picture Manager. Select the Plus symbol next to Office Tools. Then, choose Run from My Computer by clicking the arrow next to Microsoft Office Picture Manager.
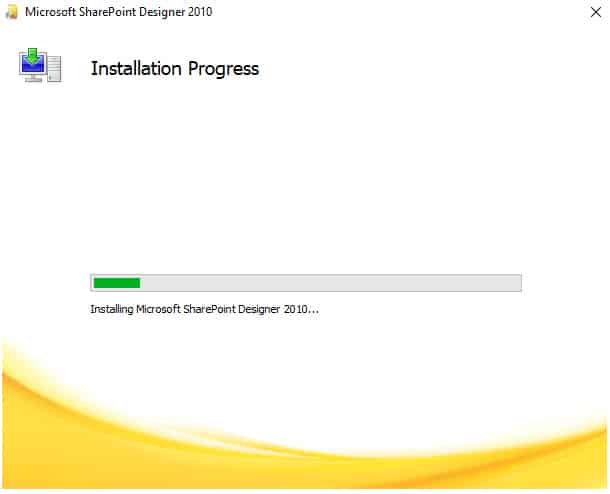
6. Wait for the wizard to finish the installation after clicking the Install Now button.
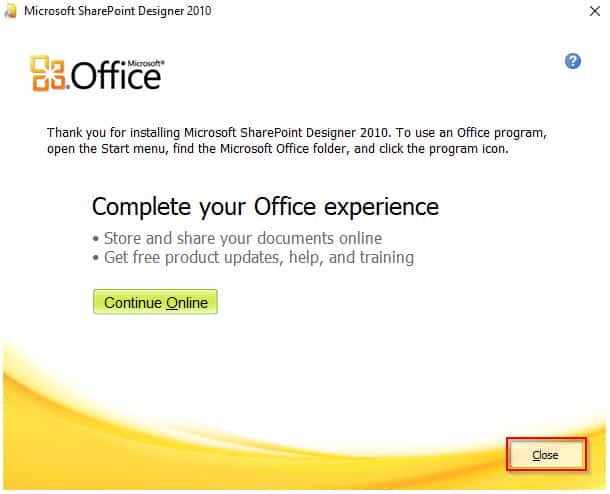
7. Select the Close option to leave the wizard when the installation is completed.
8. In the Start Menu, type Picture Manager and launch Microsoft Office Picture Manager.
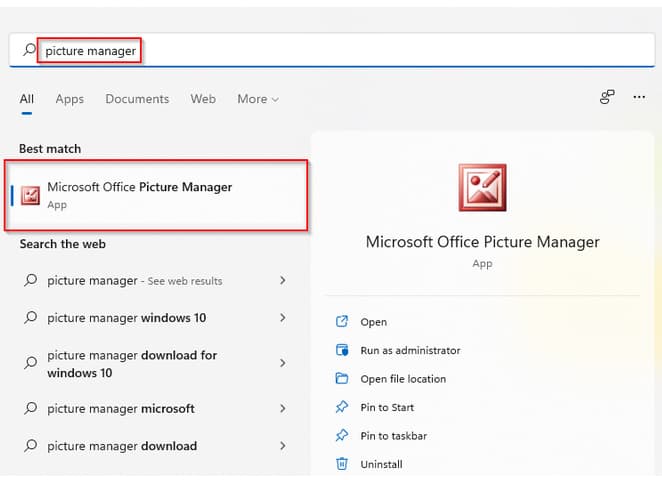
9. Microsoft Office Picture Manager should now be available to you.
Since you now have access to the Picture Manager, you are free to use it to browse through and view changes to the pictures stored on your computer. You may even make it your default picture viewer.
Why Should You Use Microsoft Office Picture Manager?
It might be helpful to use the Microsoft Office Picture Manager instead of the Photos app since it loads a lot faster. In addition, a picture Manager may be less irritating when you need to get things done quickly.
Microsoft Office Picture Manager also has several features that the new Photos app does not have. Consider the red-eye eradication tool. You can still perform basic photo editing using the Photos app, just as with the Picture Manager. Furthermore, Picture Manager enables you to share pictures through email or establish an image library on your company’s intranet.
Take Advantage of the Vintage Feel
Microsoft Office Picture Manager brings back memories of Windows XP from two decades ago. While the Photos app has many comparable (and many additional) features, Picture Manager may be a better choice if you want a faster, Microsoft-created alternative. So this is article on how to reinstall Microsoft Office Picture Manager in you Compute. Also read article on how to Install Windows 11 22H2.


